

The default contact birthday property in HubSpot is a text field (not a date), so it can't be used properly in Workflows and other tools. However, you can create a custom date property and use it anywhere within the system.
In this article, you will find a step-by-step guide on how to operate with a date-centric Birthday property in HubSpot.
How to create a date property in HubSpot
-
Open your HubSpot account and click the settings icon in the main navigation bar.
-
In the left sidebar menu, navigate to Properties.
-
Navigate to the Select an object dropdown menu and click Contact properties.
-
Click Create property.
-
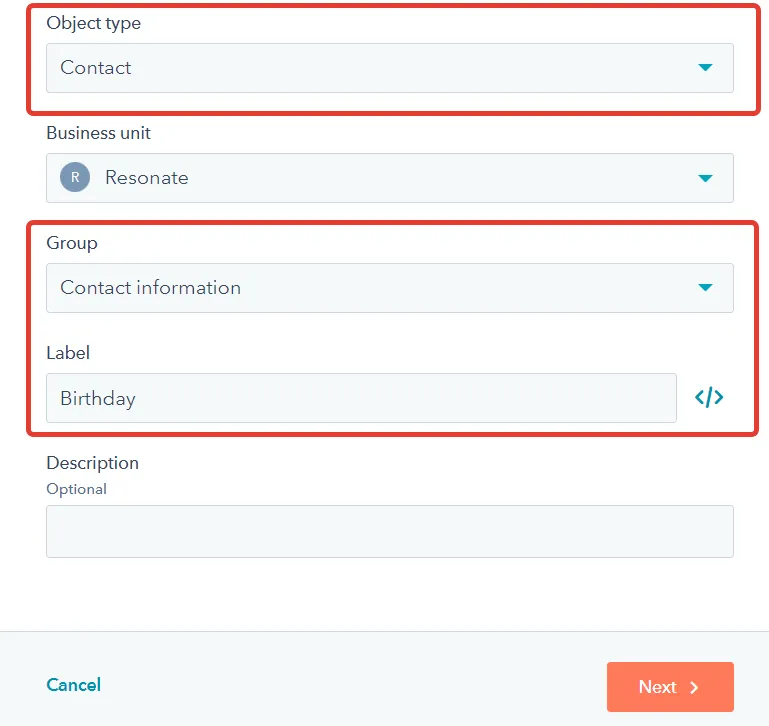
Fill in Object type, Group, and Label and click Next.
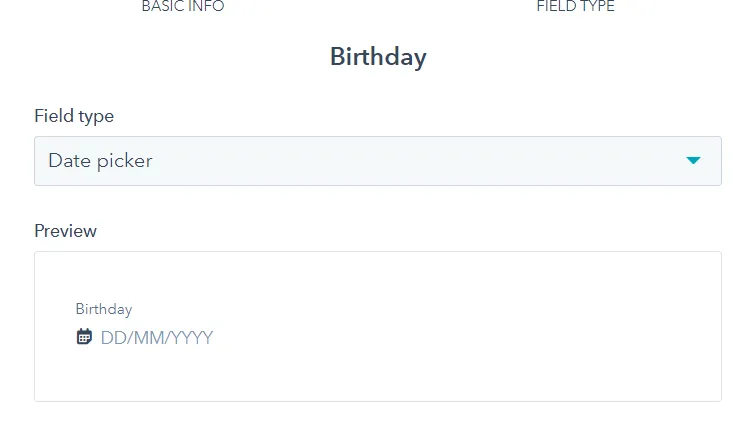
- Define the field’s type as Date picker and click Create.
You have successfully created a custom Date property.
Add a birthday field the default view
In HubSpot, you can customize fields displayed in the left-side menu of objects. You can add the Birthday field to the default view, so you will see it each time you open the record.
-
Open your HubSpot account and click the settings icon in the main navigation bar.
-
In the left sidebar menu, navigate to Object => Contacts.
-
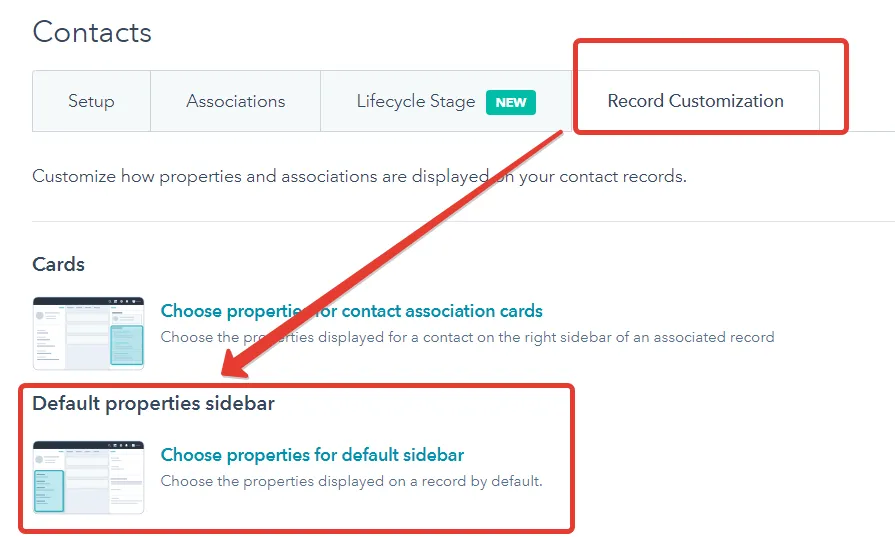
Go to the Record customization tab, click Choose properties for default sidebar and the click Edit.
- Use the search bar to look for the Birthday field.
- If necessary, change its position within the section and click Save.
You have successfully added a new Birthday property to your contact’s default screen.

Create a Center on date workflow
One of the use cases for the Birthday field is sending automated emails with greetings. The logic is simple: HubSpot checks the current date, and if it matches with a property value, the system performs any action (i.e. Send an email).
-
Navigate to Workflows and click Create workflow.
-
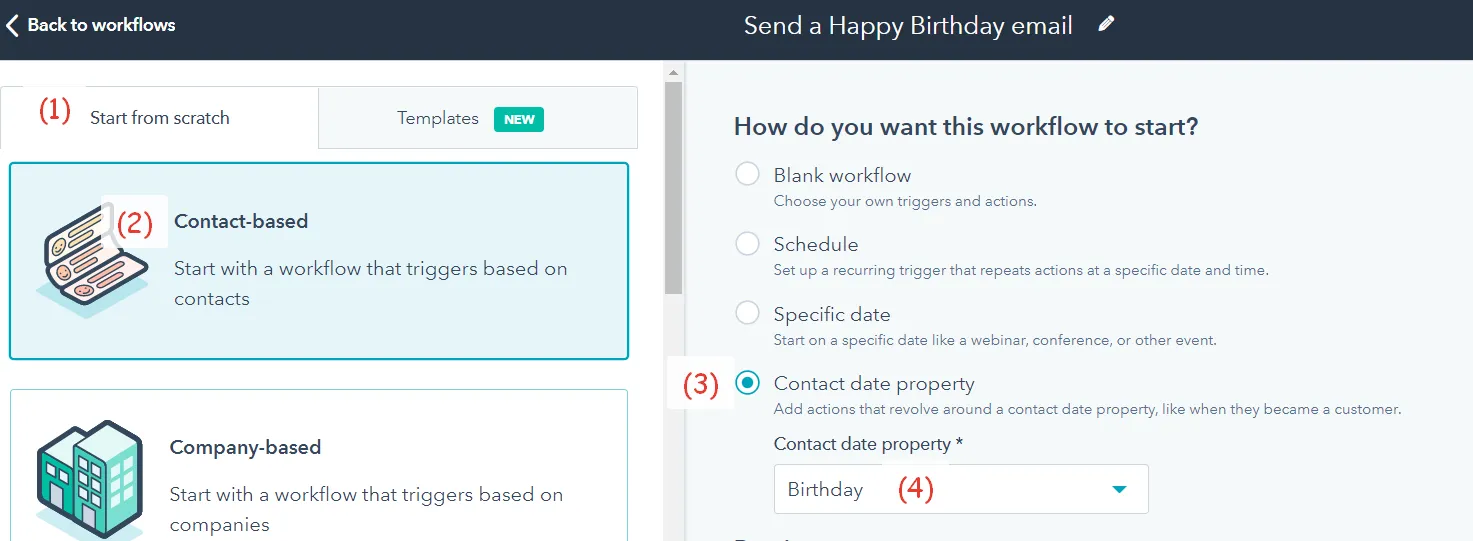
Click Start from scratch (1) and select Contact-based (2).
-
Click Contact date property (3) and select Birthday (4).
-
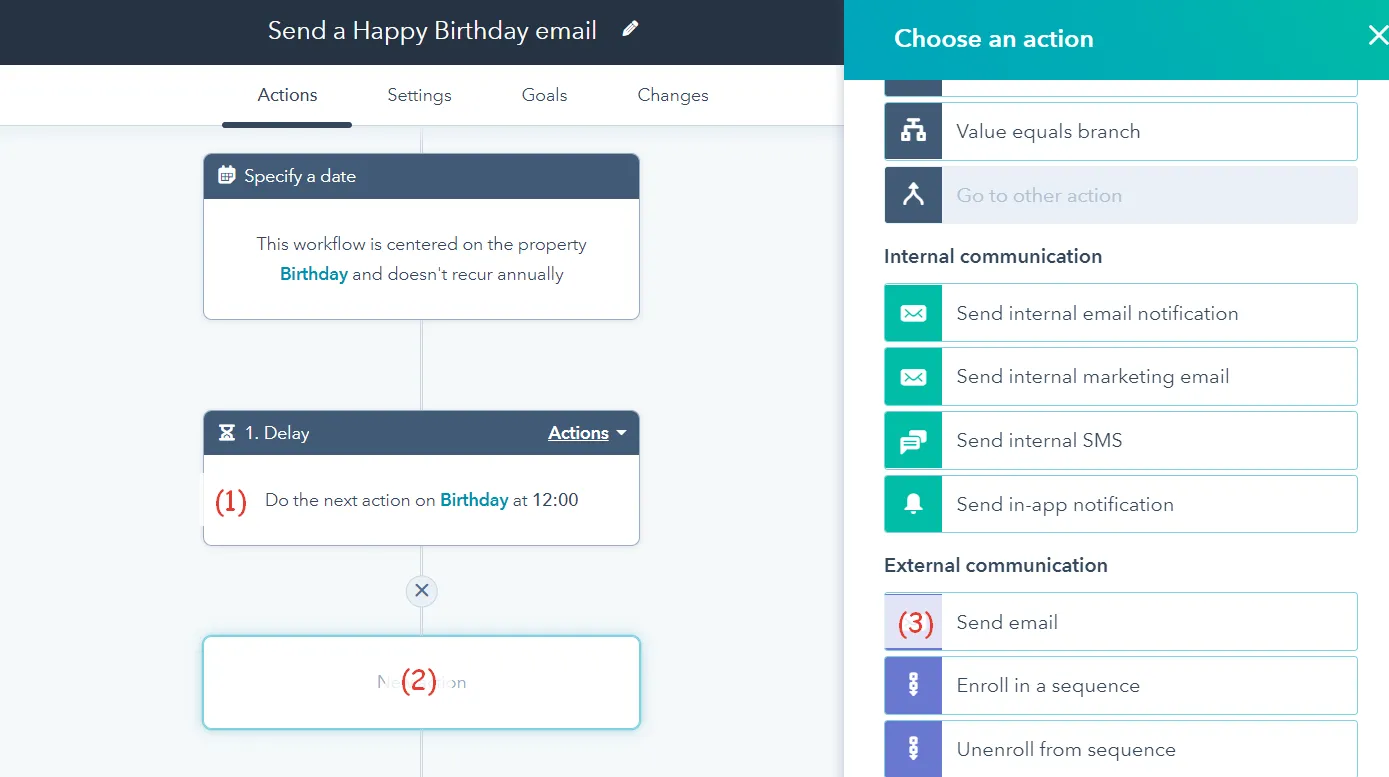
On the Workflow page, set up a Delay of your choice (1). It indicates when the workflow is going to perform an action.
-
Click a plus icon to add an action (2) and set up one of the options (3). As we are going to send a Happy Birthday email, we select Send an email. Select one of the automated emails and click Save.
- Click Review and publish to review your workflow settings.
- Set up the Re-enrollment criteria, so the contact will re-enroll in the workflow multiple times (i.e. multiple years).

- Click Turn on.
Now on each birthday, the contact will receive a Happy Birthday email. Want to get the most out of HubSpot? Check out our HubSpot Onboarding and Re-Onboarding services